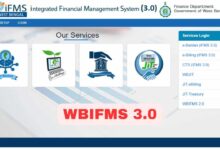
How to add beneficiary Account Number in e-Pradan of WBIFMS

This article shows the process to add beneficiary account number in e-pradan. Before creating any bill in e-billing, HRMS or e-pradan it is needed to add the beneficiary bank account number for the employee or a supplier or service provider (except WBSEDCL, BSNL).To add beneficiary account in bulk or individual, we need to follow some simple steps.
Add beneficiary Account number in e-pradan
1) Open any browser and go to the URL: https://wbifms.gov.in or Click Here
The Homepage of WBIFMS portal will appear.

2) Click on the Login option or click on e-pradan/e-billing/HRMS option.
The Login page will appear.

3) Login using DDO user Id and Password.
The Application list page will appear.

4) Click on e-pradan and open e-pradan page.

5) Click on Master ⇒ Beneficiary Master
The beneficiary Master page will appear.

Entering Account Number in e-Pradan:
Process 1: Direct Entry
In this process, I will show you how to enter beneficiary data in e-padan directly without using excel file. This process is easy and simple for creating one or two beneficiary at a time. If you need to add more beneficiary like 10 or 100 etc you need to follow the process 2.
1) Click on Insert Button.
The beneficiary insert page will appear.

2) Add Beneficiary Name, Bank Account Number, IFSC Code, account type, Beneficiary Type Group, PAN Number, Mobile No etc in the row.
You can add beneficiary as many as you need. I recommend you to follow process 2 for entering more than 10 beneficiaries.
Click on Save button
Process 2: Import beneficiary account number from excel
1) Download the Excel Sheet from the Below Button.
2. Open the downloaded file and enter beneficiary data.

3) Click on Import from excel button

4) Click on the Browse Button and Select The Excel File

5) Click on Import option
The message shows “Record Inserted Successfully.”
Approving The Beneficiary Data
1) Click on the dropdown arrow of Status and Select Un-Approved
2) Type Account No or IFSC Code
3) Click on Search Button
The Beneficiary List will Appear

4) Check the Approve Flag Checkbox
5) Click on Approve
The message shows “Record Approved Successfully.”
Thank You 😊


This is very helpful.